NopCommerce is an open-source Ecommerce solution. You can create dynamic and smashing online stores using NopCommerce. There are many awesome features this solution have.
Let us tell you how to create a new Category in NopCommerce
After logging into admin panel, Go to “Catalog–> Categories

Click on “Add New”

Write Category Name, i.e Laptop, Servers (categories may vary according to your product)

Upload Image related to your category, Image will display with each category in “Main Menu”
Step 2: Check the box if you want to show category in “Main Menu”
Step 3 & 4: You can select how many products should be displayed on this category page. And if visitor/customer can select page size or not.
Step 5: Check “Publish” box to make your category live

Click “Save and continue edit” and move to “SEO” tab

SEO tab is very important for your website appearance and ranking on search engines. This is a built-in feature in NopCommerce that let you optimize your website/store in a professional way with a small effort
Put Meta keywords, Meta Description, Meta Title and Search engine friendly page name. For more information about Meta keywords and description, Click here.
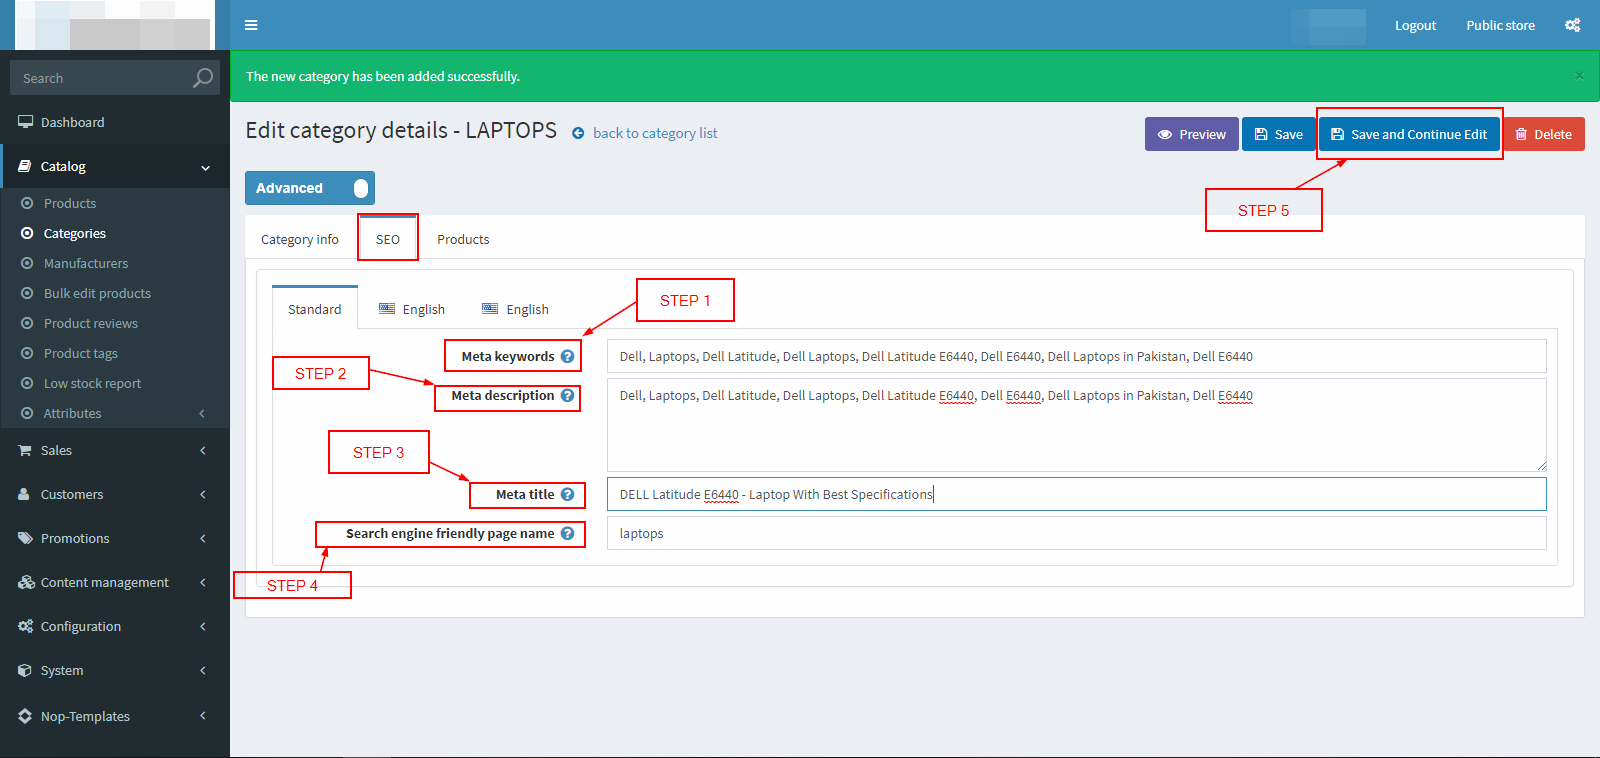
Be sure to click on “Save and continue edit” to save your progress after processing each tab. Move to next tab “Products”
“Products” tab shows all products falling under the specific category, You can go to “Product” page to add category or you can add product here on category page. Both get the same result
Click on “Add Product”

A new popup window will appear with the list of products and some search criteria, Check the box before product name to map it with this category and click “Save”

After adding products into the list, Click “Save”

Leave a Reply