Microsoft Word is used for drafting, letter writing and business documentation. We need to mark some documents as confidential or we need to make our document organization specific by pasting our company logo as watermark. Let’s learn how to add text/Picture Watermark to MS Word Document
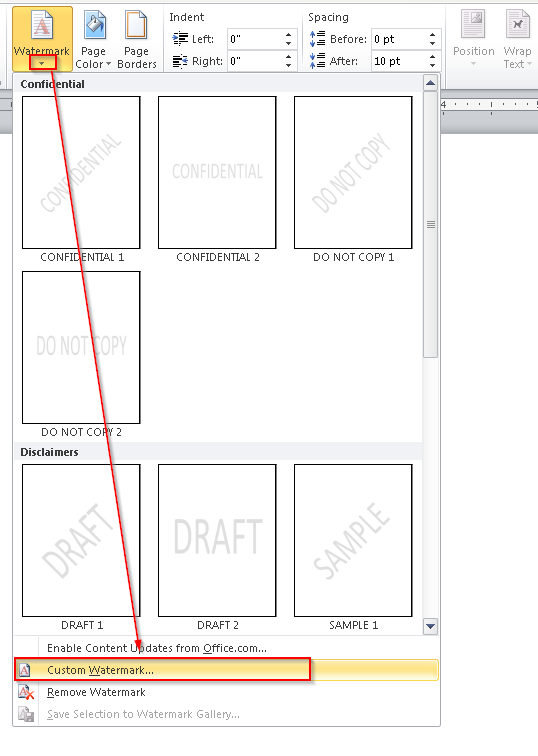
Open a MS Word document, Go to “Page Layout” and “Watermark”

Click on small down arrow to explore the menu and go to “Custom Watermark”
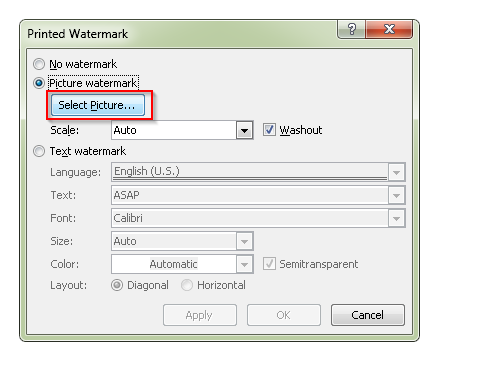
Check the box before “Picture Watermark”
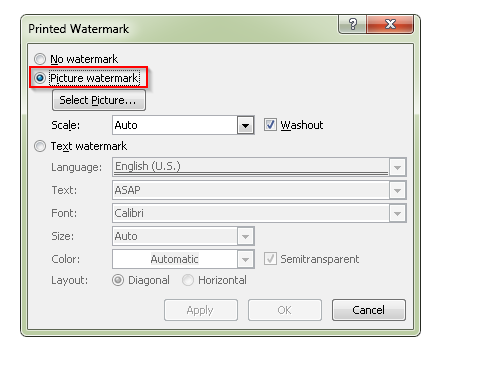
Click on “Select Picture”
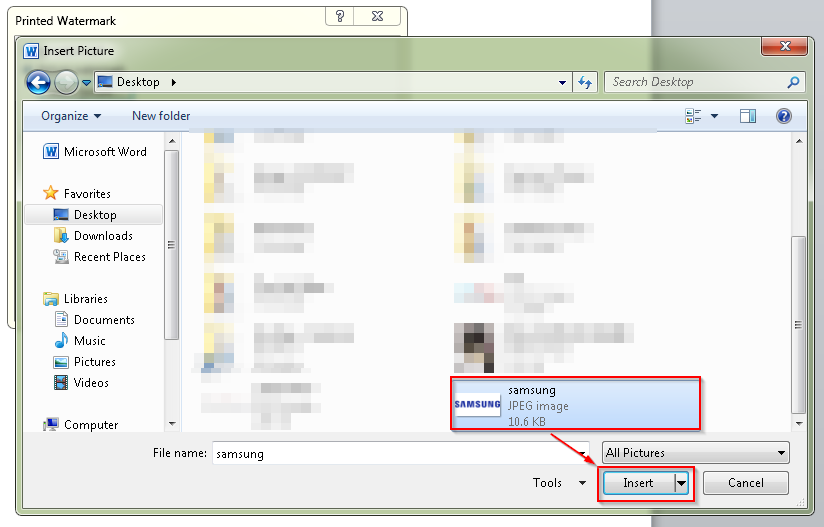
You will be redirected to your folders, Browse for the picture
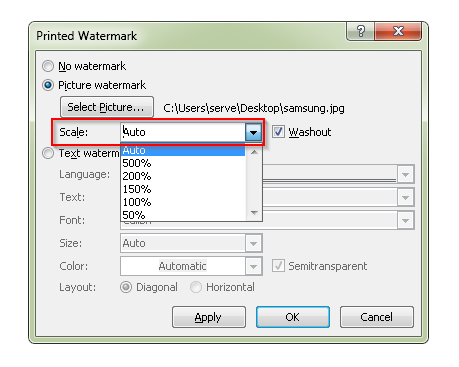
You can Scale your picture
Check the box “Washout” if you want your image to be less visible and Click “OK”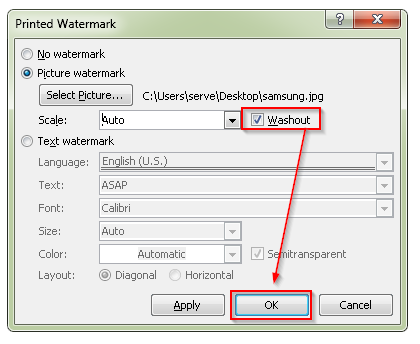
Here’s the result

For Prominent visibility of your picture, leave the “Washout” box unchecked
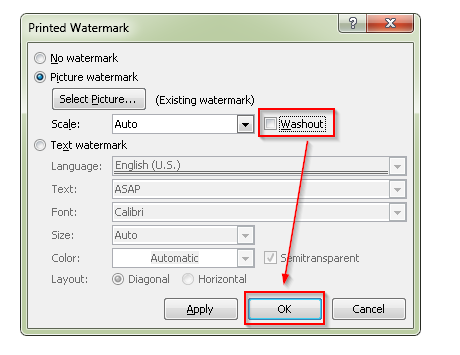
See the result

If you wish to add a text watermark, check the box before “Text Watermark”
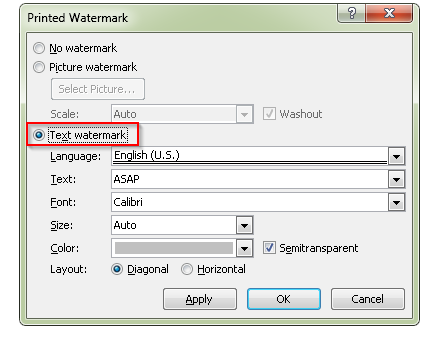
You can change the language of watermark and write the desired text in “Text” section
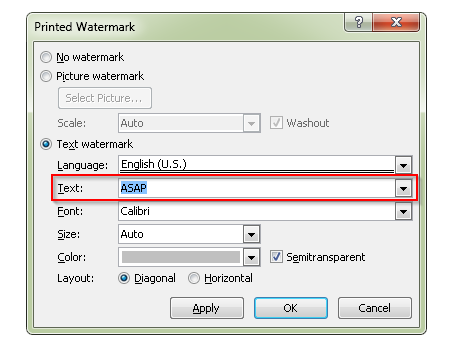
You can also change Font, Size and Color of text
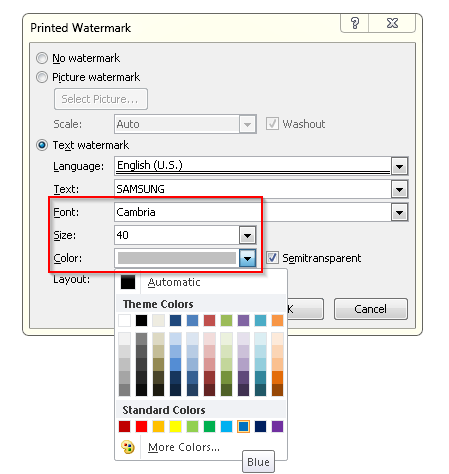
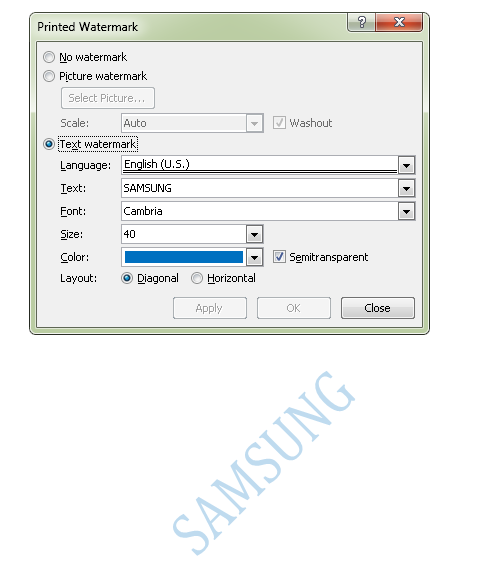
Select “Semitransparent” to less visible your text as watermark
Uncheck “Semitransparent” if you wish to give your text a prominent visibility, also see horizontal effect
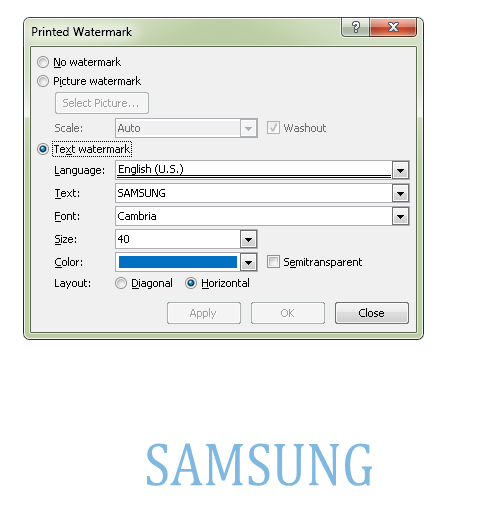
Click “Apply” and “OK” to save the results.


Leave a Reply