When it comes to your business, you have more jobs to do in a short time. If you spend more time on one task, the other will remain undone. To complete all tasks in a timely manner, you need to know how to spare your time with simple techniques.
As technology has grown up, all your business communicates through email system. Email is the way; through which all communications are saved in written as compared to a verbal communication in which the talking one can skip something or the listening one can misunderstand the said words.
Some have to send a number of emails during the day to many different partners. The official email must have sender’s name, designation, organization name and contact details, but if you’re sending too many emails, you don’t have time to write your complete details below each of your email separately. Here’s the way you can design your complete contact details to appear below each of your emails automatically. Microsoft and other email service providers use “Signature” term for this. Lets us tell you how to add signatures to your emails.
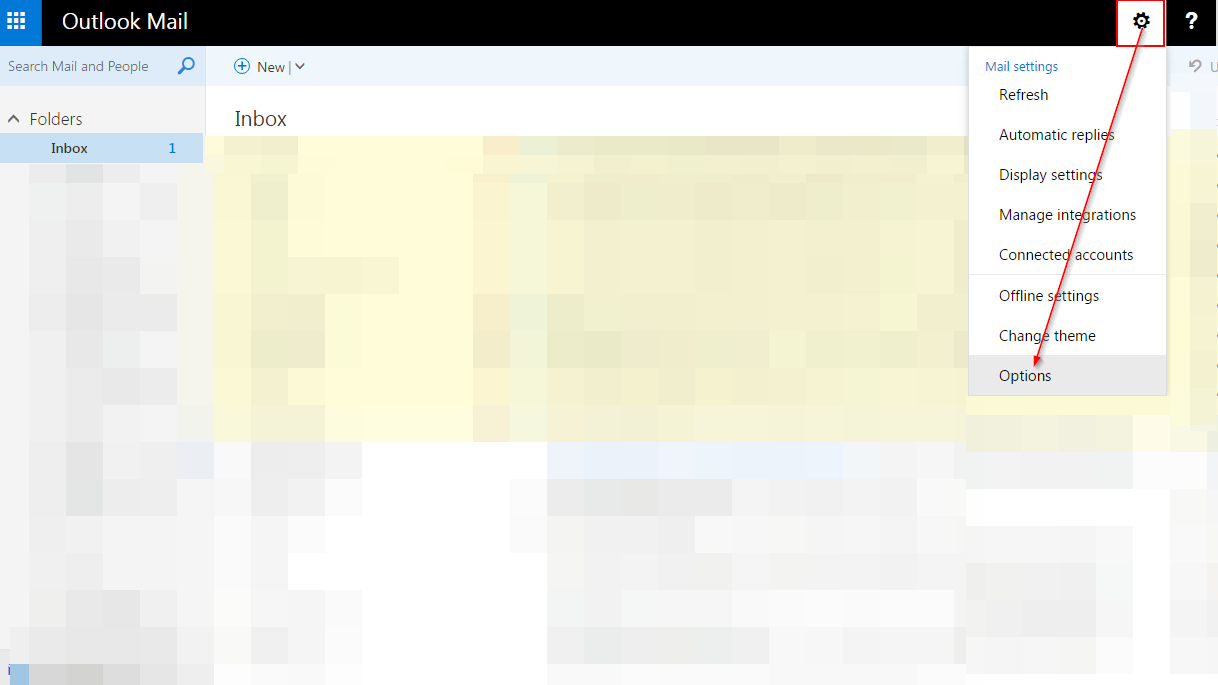
Login to your Microsoft account and Click on the gear icon on Top-Right Corner and Go to the “Options”,
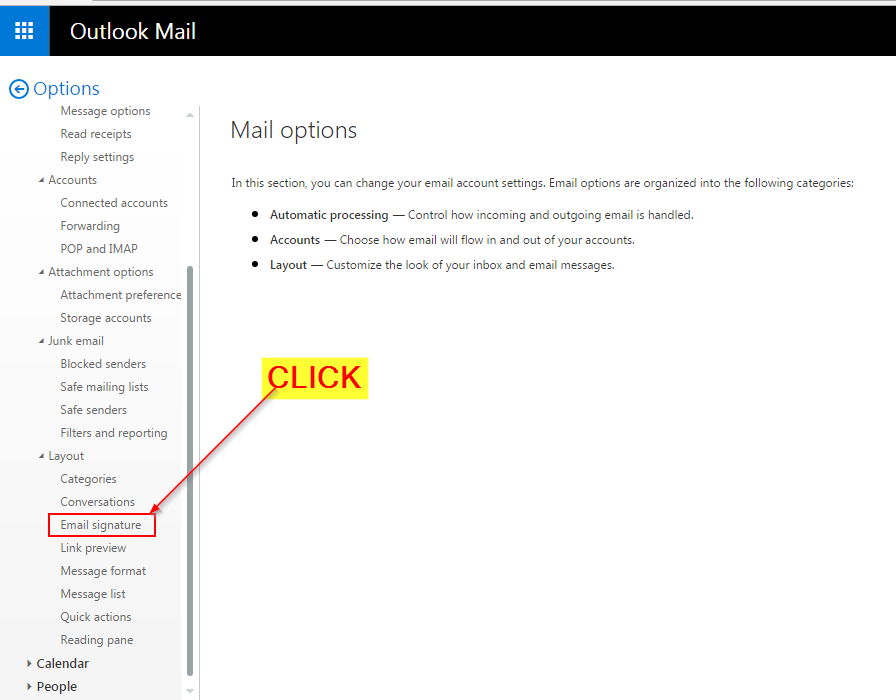
Click on “Mail” and then “Email Signature”,
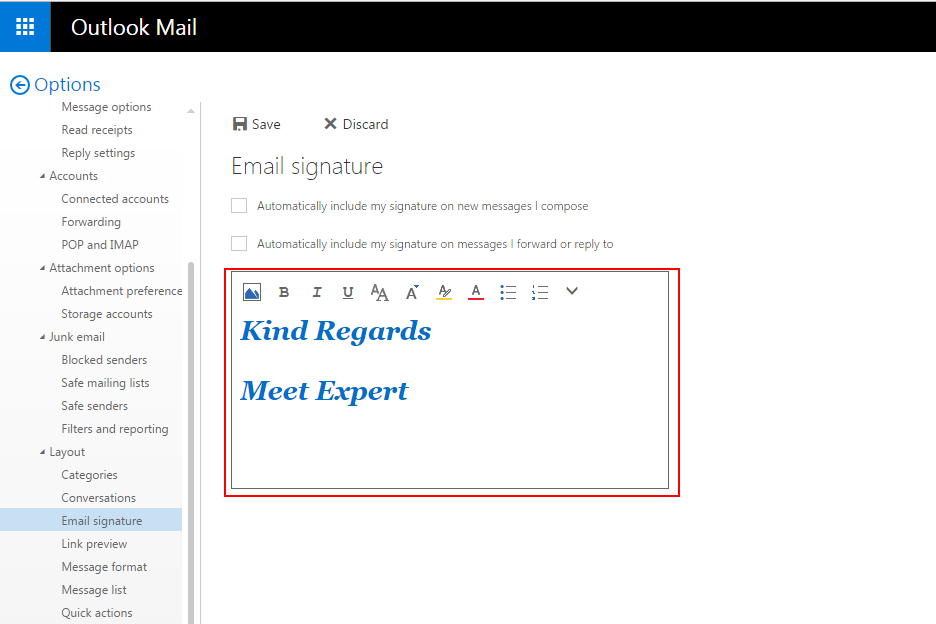
Write down your Name, Designation, Organization name, Contact details etc,
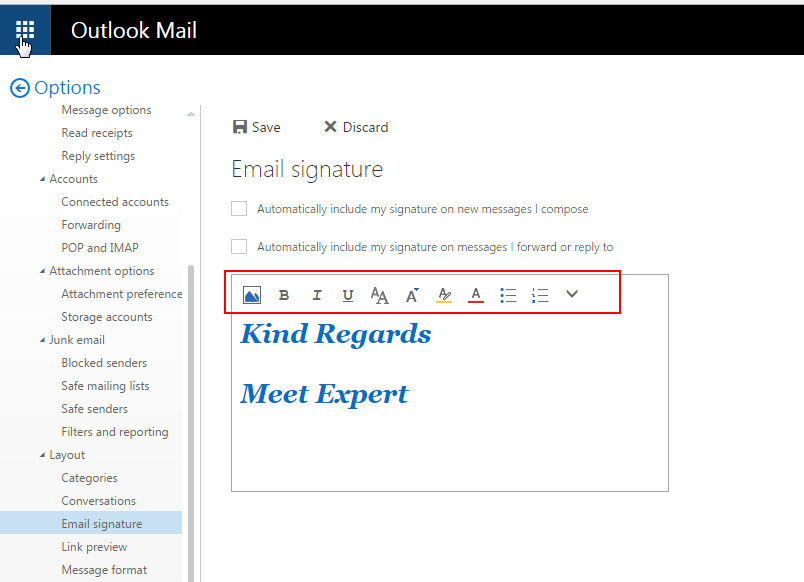
You can change font setting from the toolbar above,
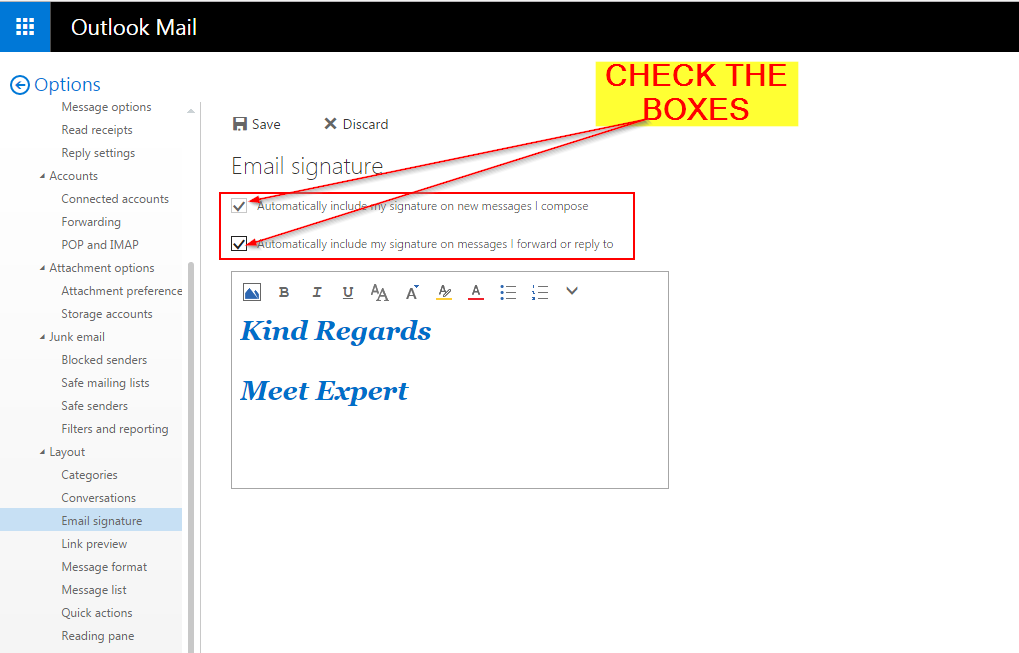
Click on the above boxes to check them, It will let your signatures added automatically to your new emails and your replies,
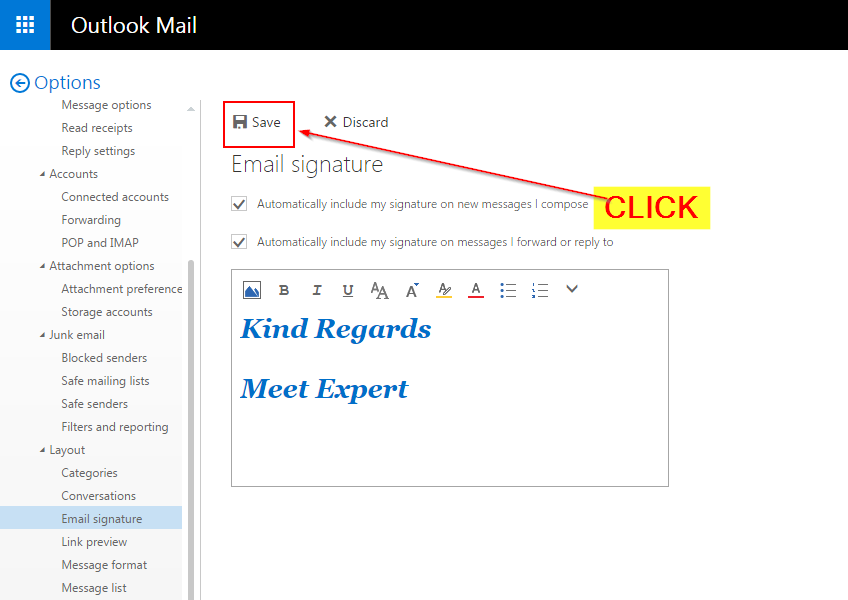
Click on “Save”,
Go to “New” to compose a new email, and you can see your signatures automatically added at the bottom of your email,


Leave a Reply