Scan to Folder in Windows 10 with FTP …..
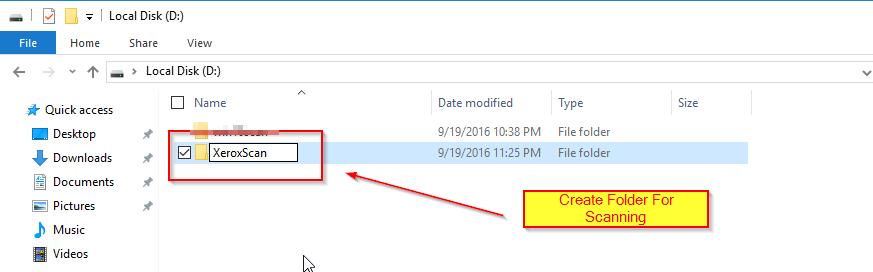
First Create Folder in Windows 10 … ” XeroxScan”
Now select Folder Properties with right click
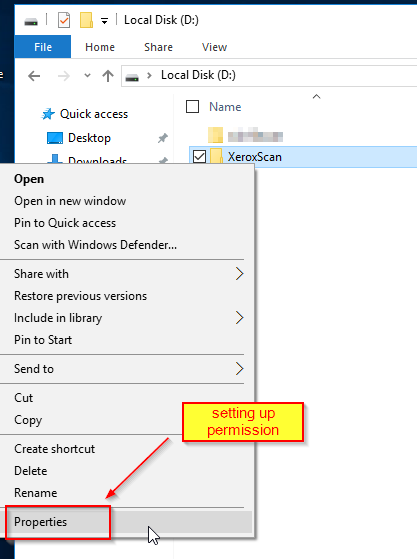
Now Setting Sharing Permission….

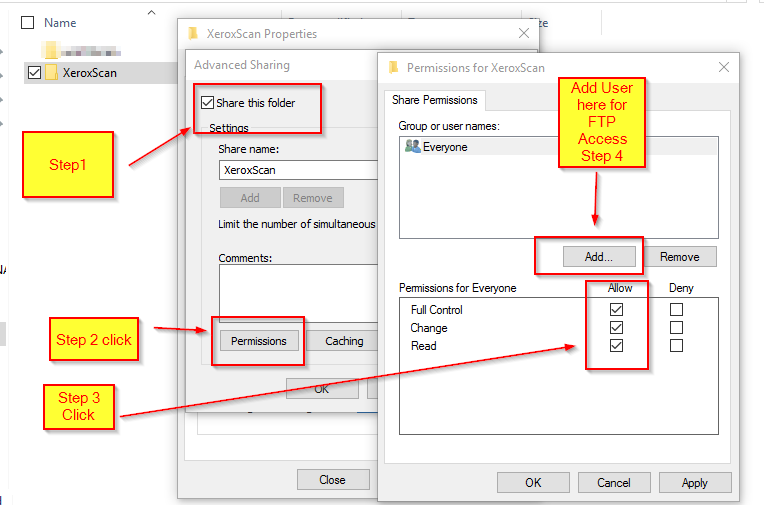
Setting up Sharing Permissions
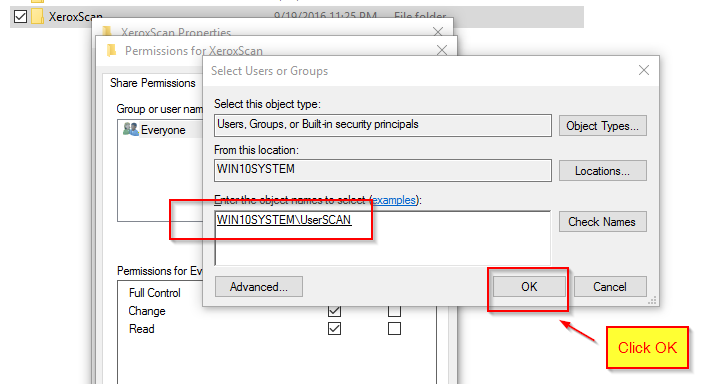
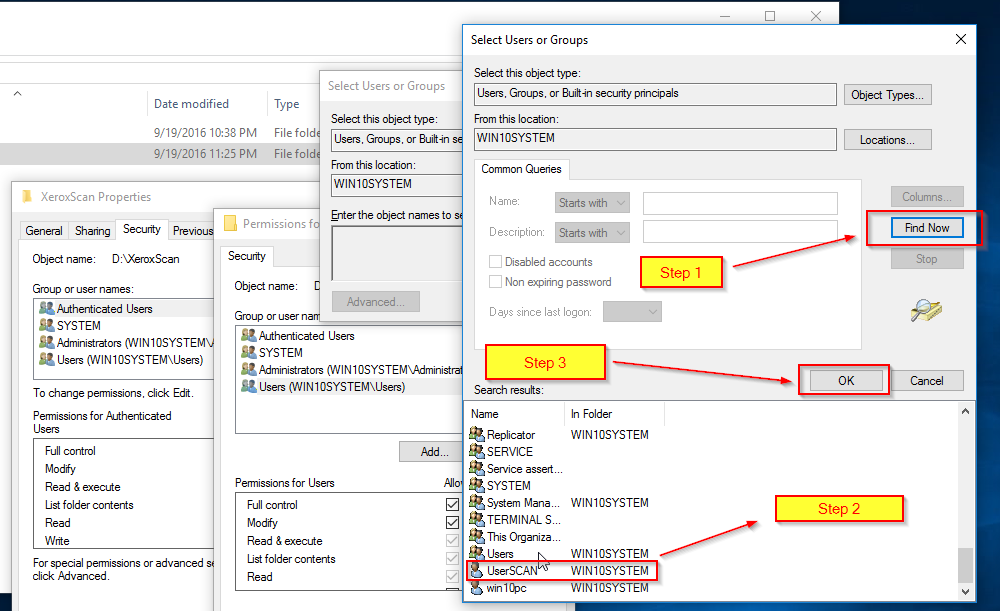
Select user with Find Now ….
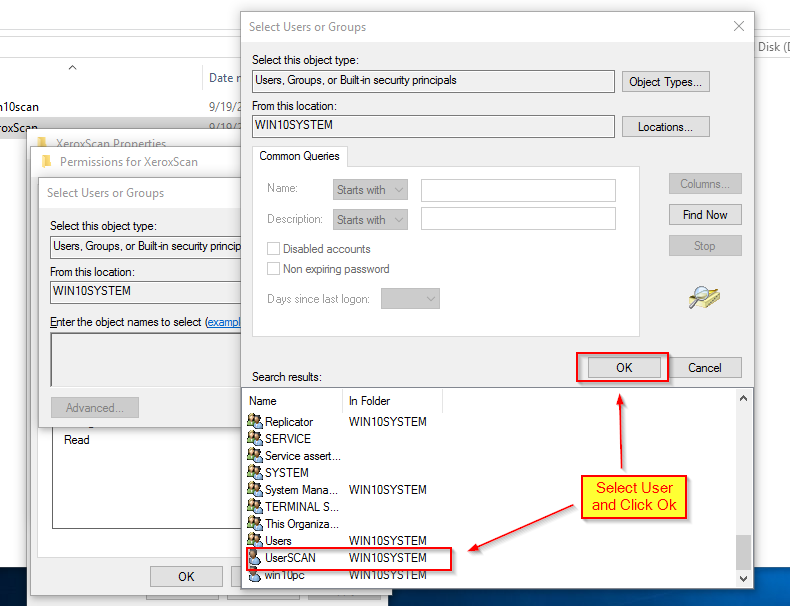
Click “OK” on Selected User
Now Select Permission ….
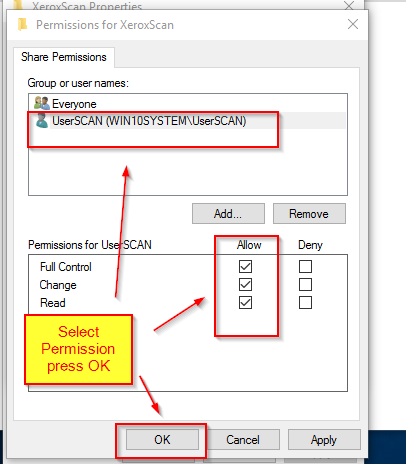
Check and Click on OK

Now Click on Security…
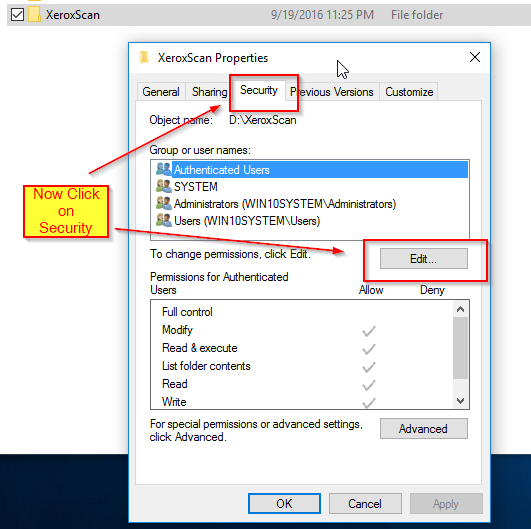
NOW Add User

Click on Advance ….
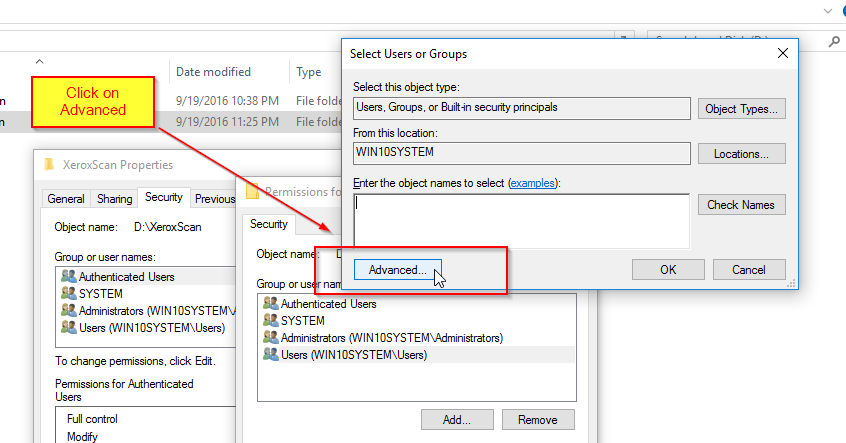
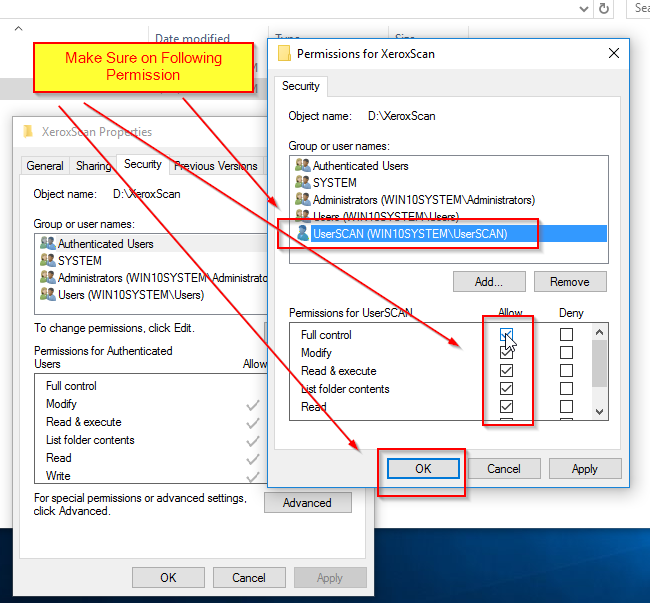
Now Select Add User which will be authorized for SCAN
Make Sure following Permissions ….
Now Right Click on Start up…. Move to Control Panel

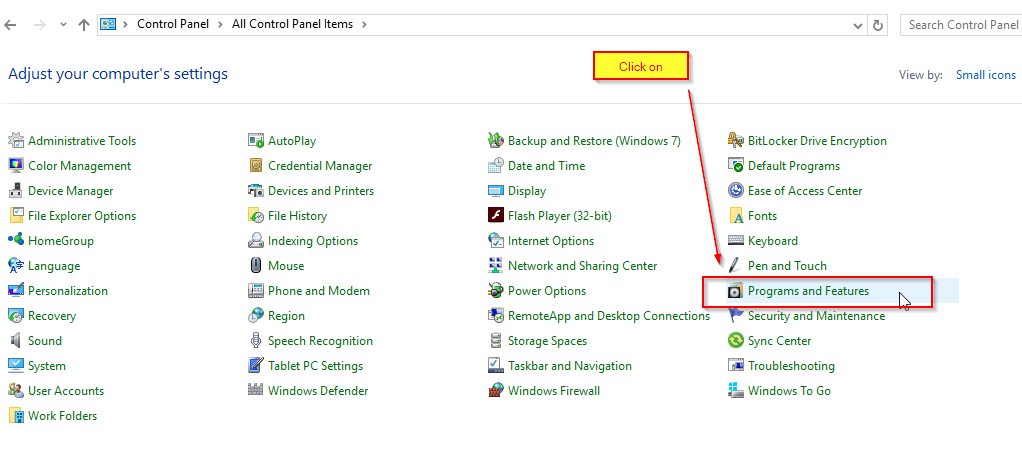
Select Small Icon in Control Panel ….
![]()
Select Programs and Features …
Features ON and OFF…
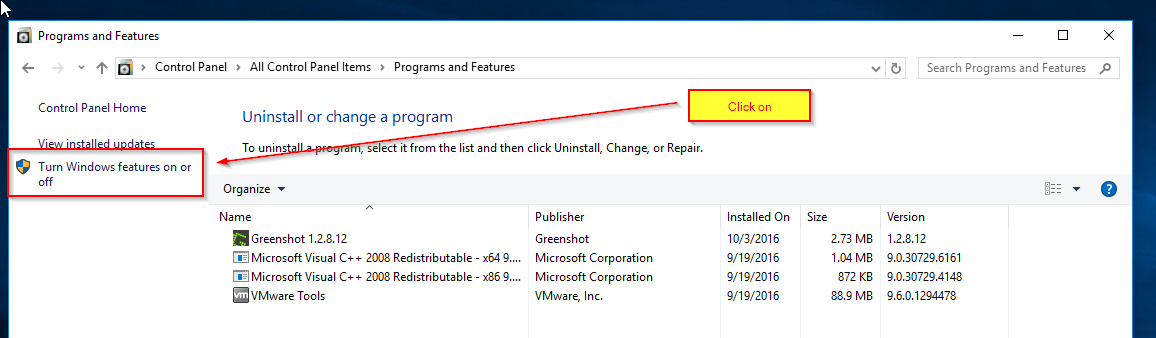
Select windows Feature on or Off
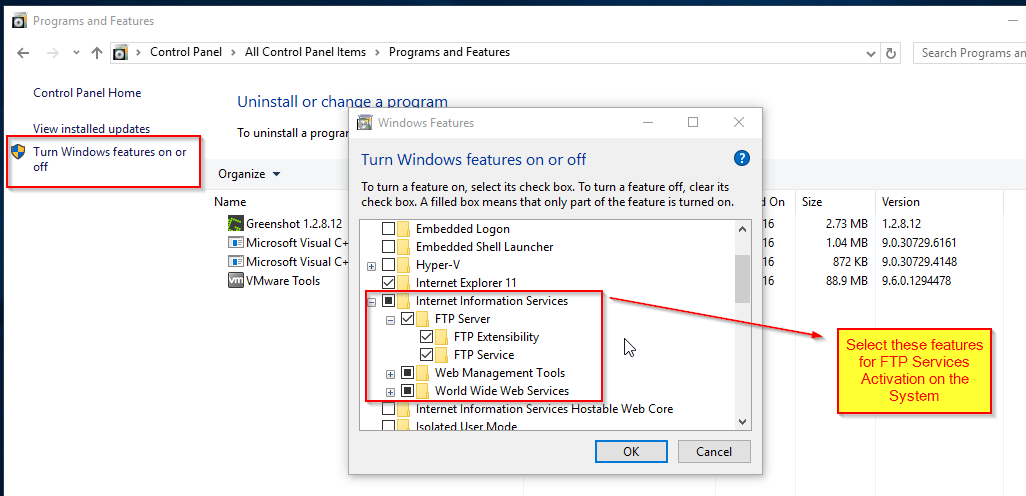
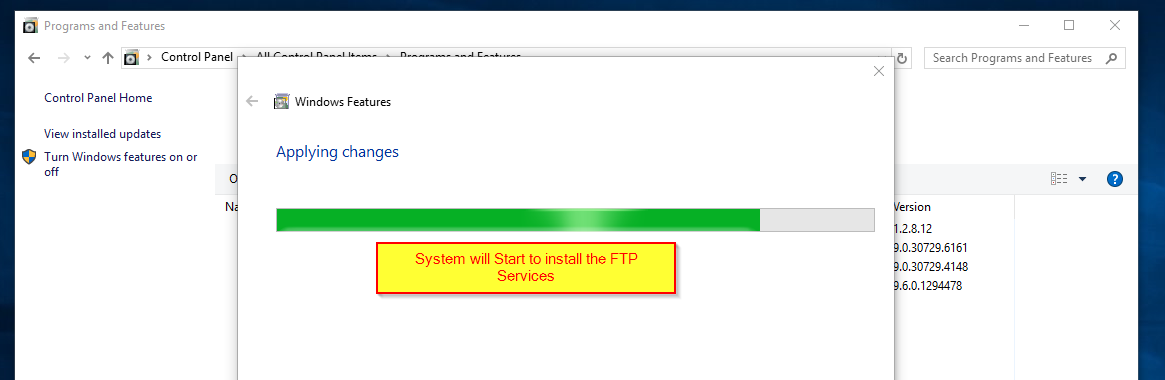
Install FTP services….
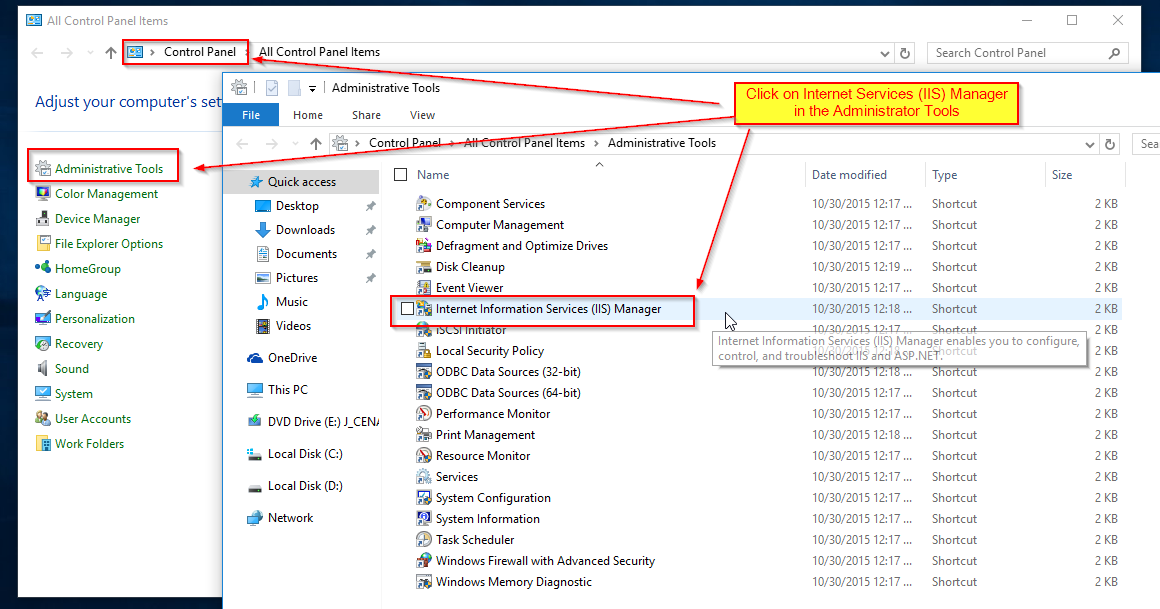
Go to Administrator Tools in Control Panel and ” Internet Information Services ( IIS ) …
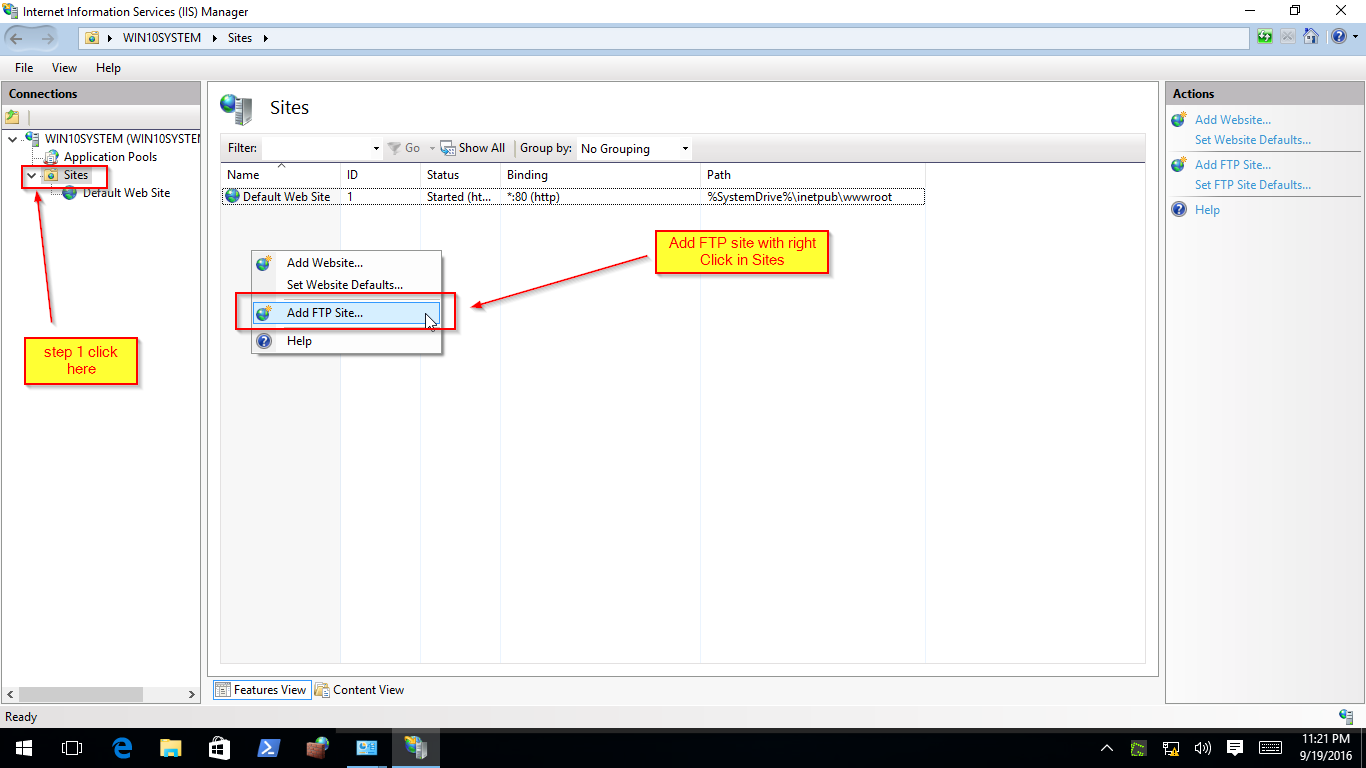
Click on Sites and then Add FTP Sites with Right Click …..
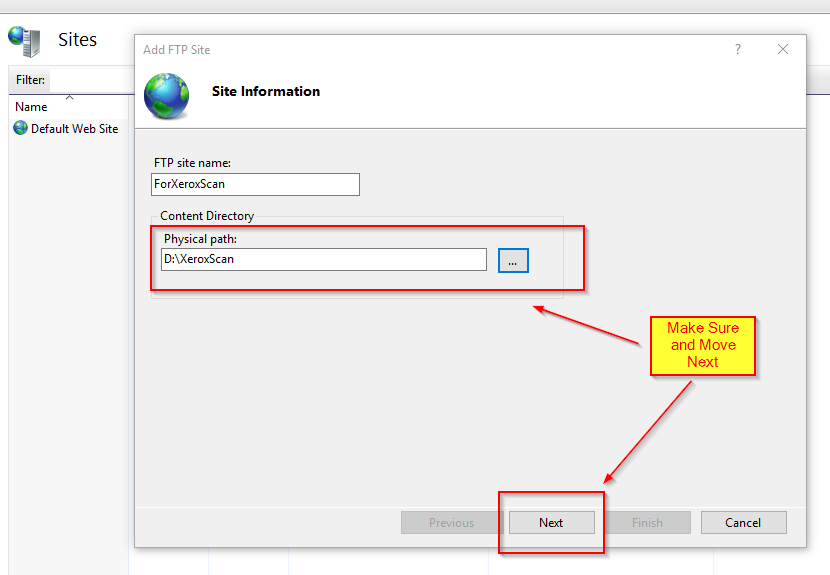
Add FTP Site Name and Folder For Scan which we have Created…
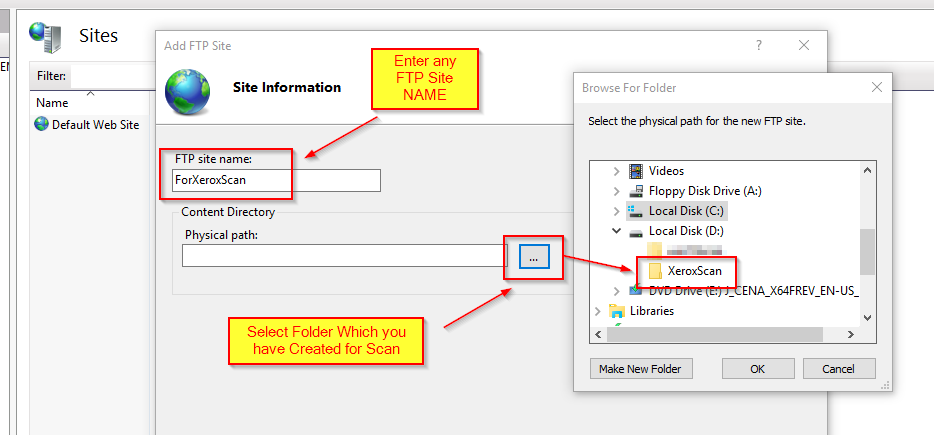
Make Sure Physical Folder path for Scanning ….
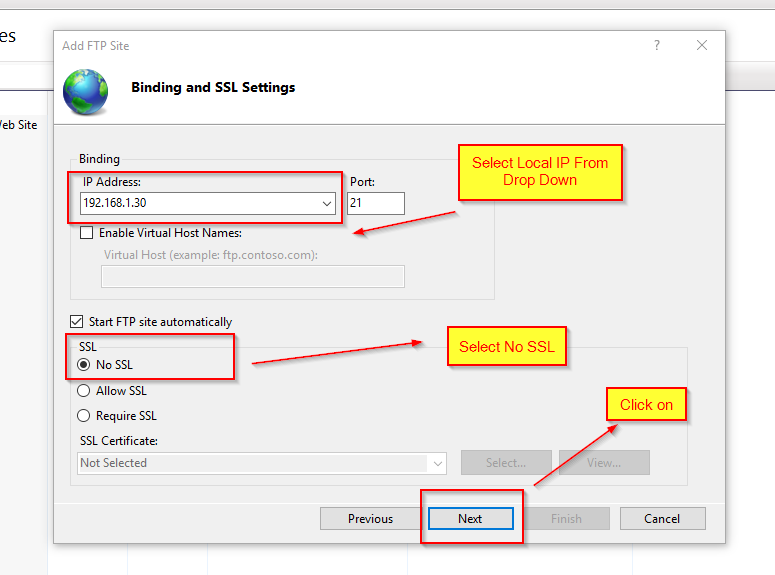
Select LOCAL Binding of IP ….
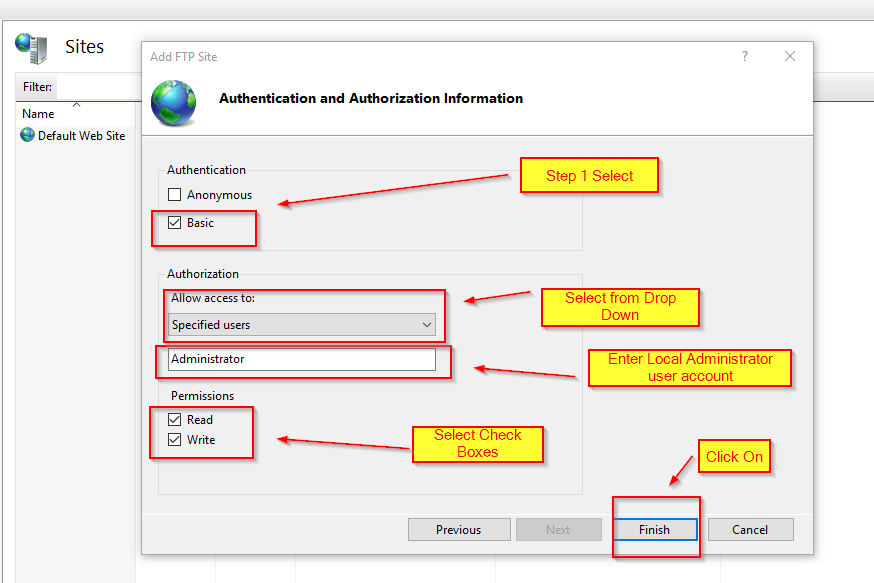
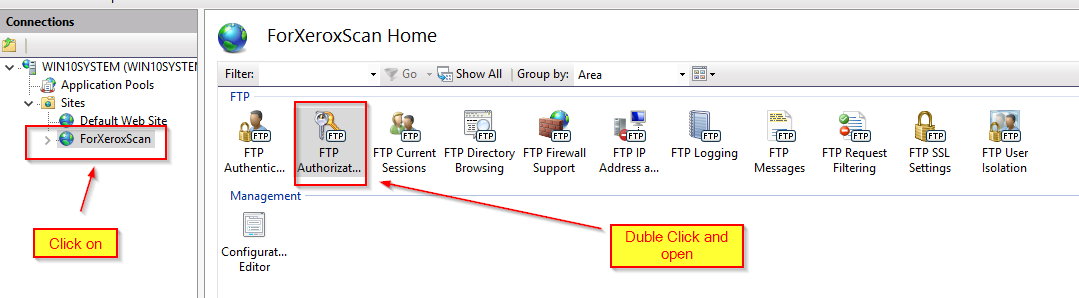
Select user and Authentications …
Click FTP Authentication Rule …
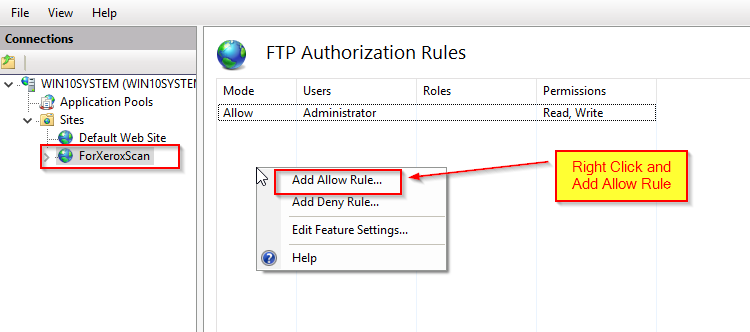
Add Authentication FTP Rules….
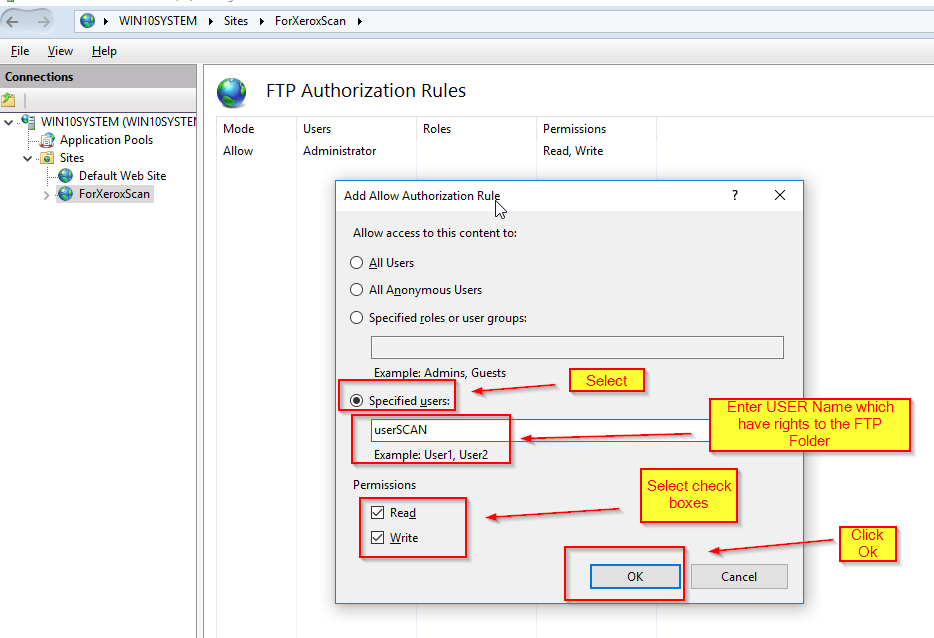
Add USER For Scanning ….
Make sure user is added in the Rule….
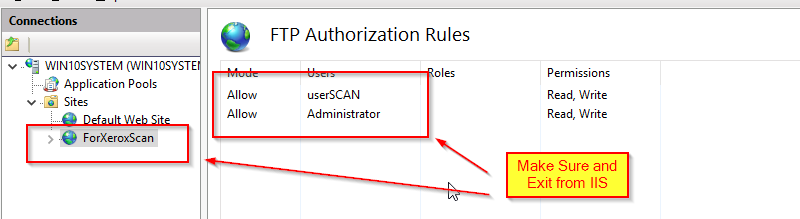
Now close the FTP and make sure your System Firewall or Antivirus is not blocking the 21 port for FTP Server …..
Now open Firewall Right Click on Network Icon …
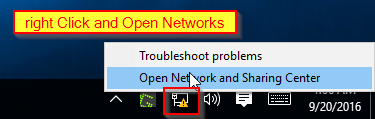
Click on Firewall in below Left Corner of Window open

Click on Firewall On or Off ….

Turn Off Firewall ….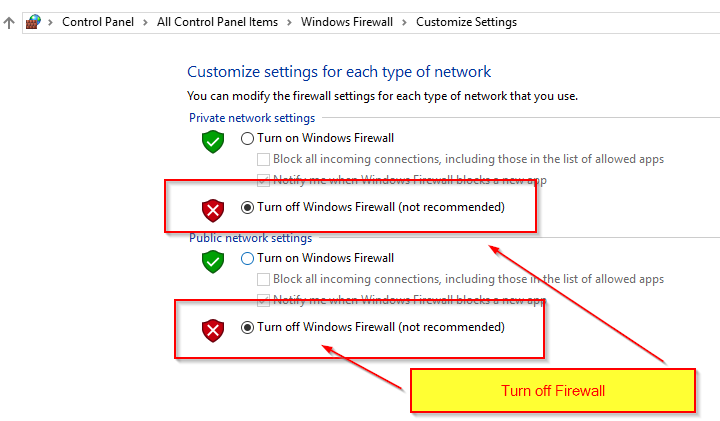
NOW Lets Create Profile on MFP Xerox / HP / Ricoh and Any Other Brand …..
we are going with Xerox MFP …..
lets enter the Machine IP address in any system Browser … we have Machine IP ” 192.168.1.237 ” and Go to Scan TAB ….

Now click on Login …
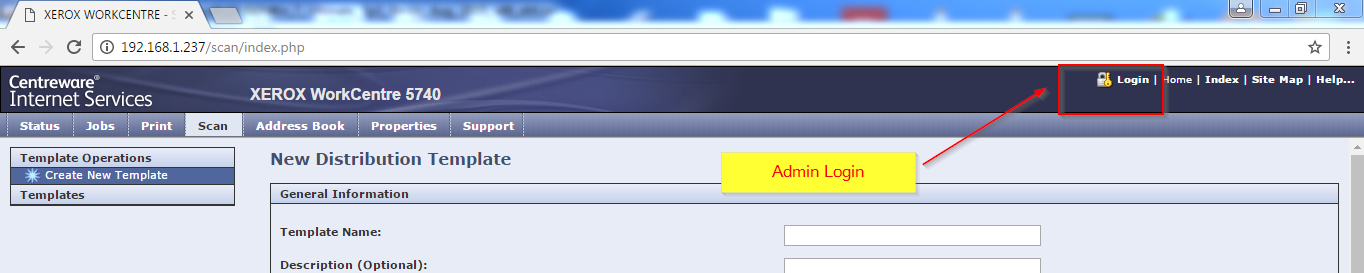
Enter Admin User and Password …. Xerox Machines have Default User Name ” Admin ” and Password “1111”

Create Scan Template Profile …. Now i am going to create “MyTemplate”

Scroll Down and Enter System FTP User Name and Password ….

Now “MyTemplate” Is Created and now i am going to set some basic setting in this Scan Profile ……
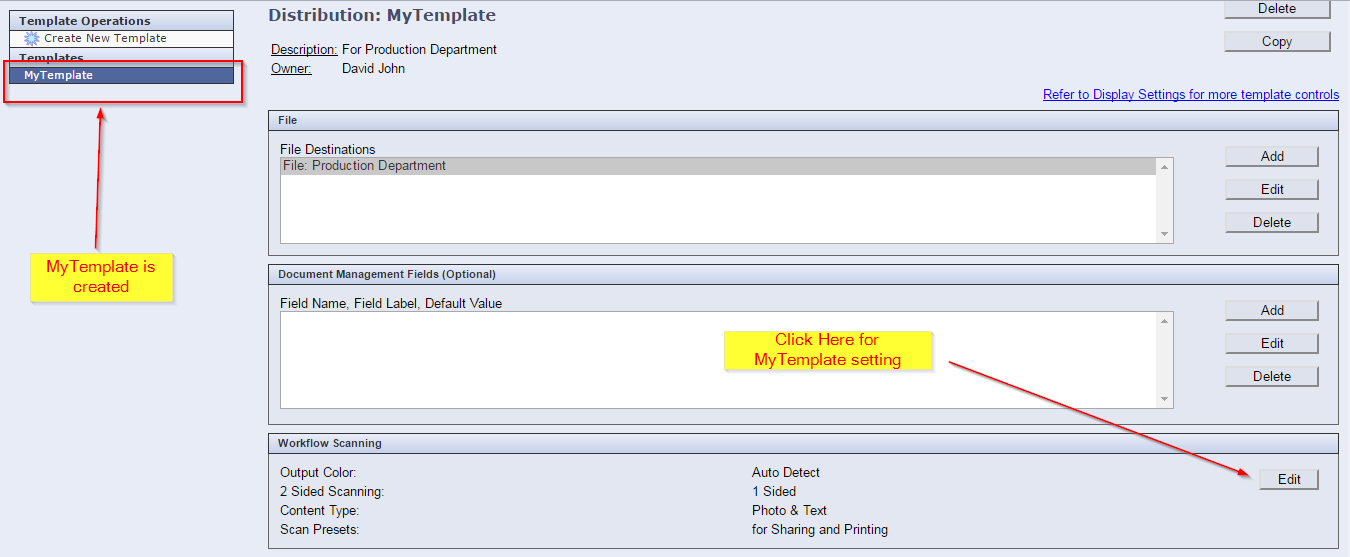
In Workflow Scanning just select “Simple Scan”

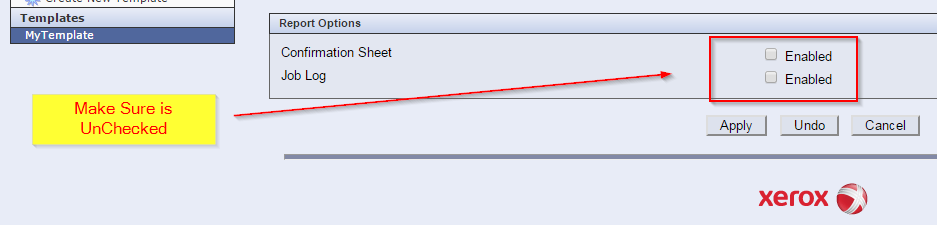
in Report Option in “MyTemplate” Turn Off Reporting after Scan ….
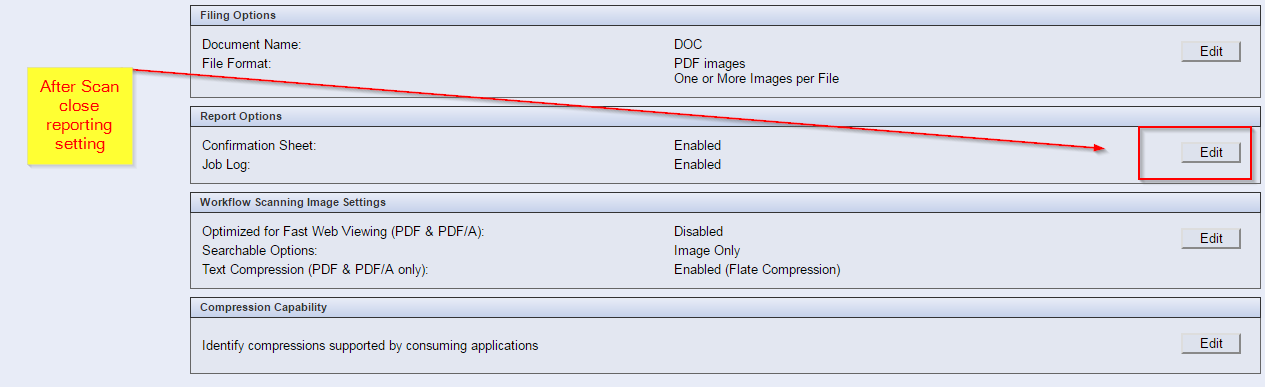
We can Change the Format of Scanned Document …
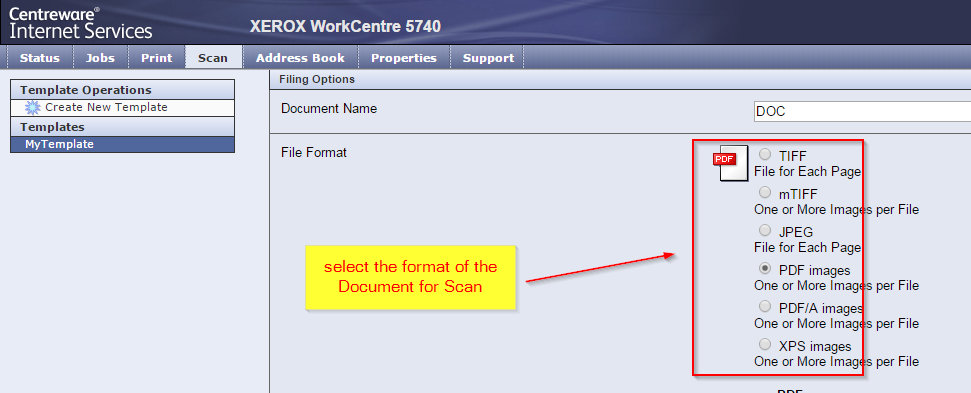
Just go in “filing option”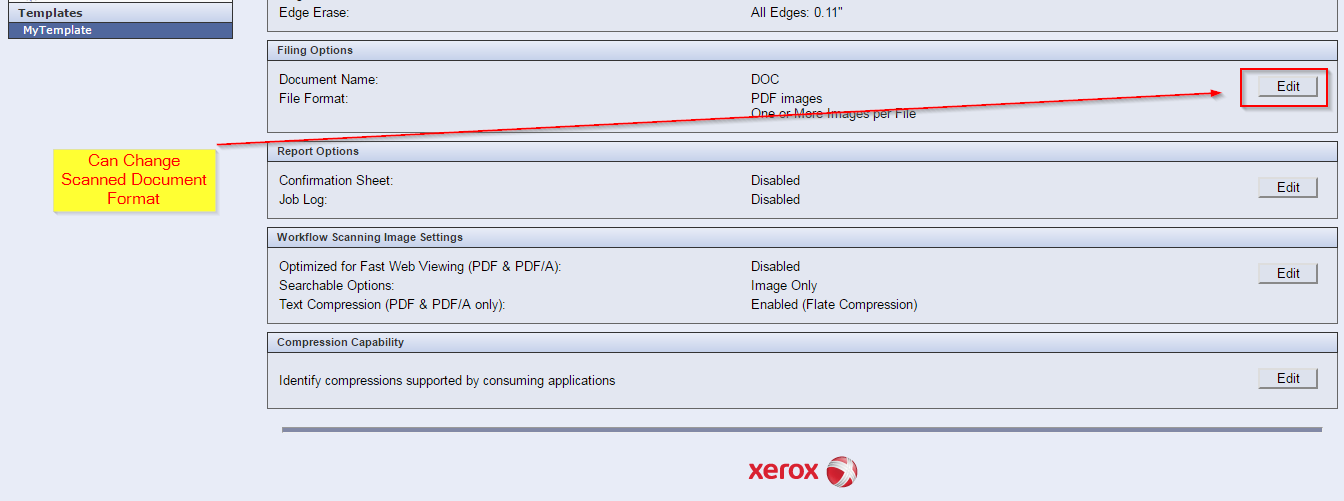
and Select the desire format which you want to your documents ….
Now You Can Scan Document just from your MFP Panel …… where is Showing “MyTemplate” Scan profile ….
How Change pfSense firewall Gateway or Default internet Connection
How Change pfSense firewall Gateway or Default internet Connection


Leave a Reply