Step 1: Go to “Business Partners” and click on “Vendors”

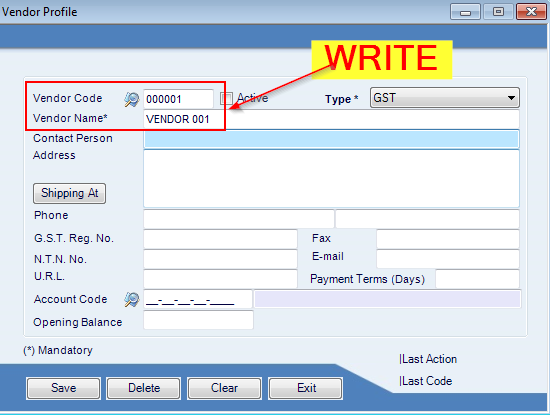
Step 2: Write down “Vendor Code” and “Vendor Name”
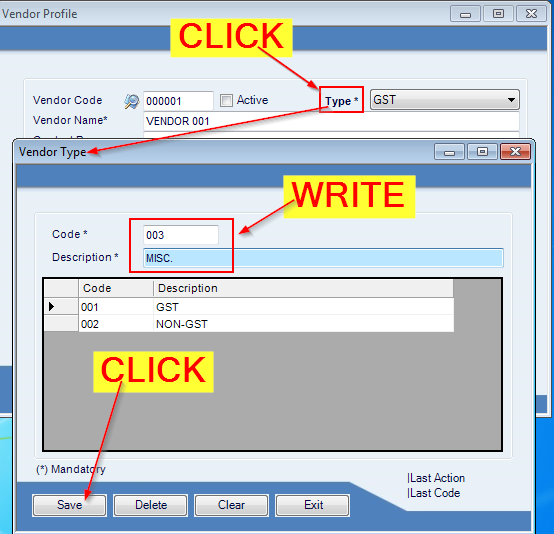
Step 3: Select “Vendor Type” from drop down. If want to assign a new type that is not listed, Click on “Type” and you will be redirected to “Vendor Type Setup”. Write down “Code” and Description and click “Save”.
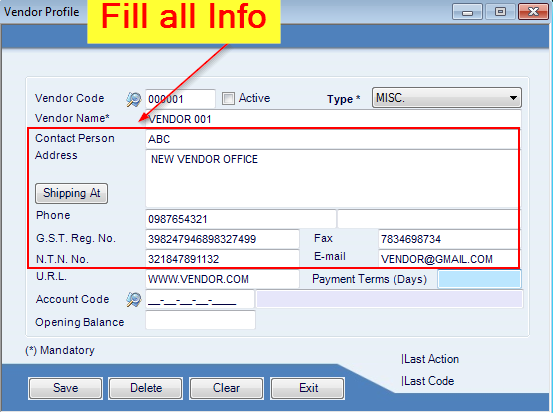
Step 4: Fill out necessary information Contact Person, Address, Phone No., CNIC, GST No. NTN, Fax, Email, etc. Fields are not mandatory so you can fill the information you have, and skip other fields.
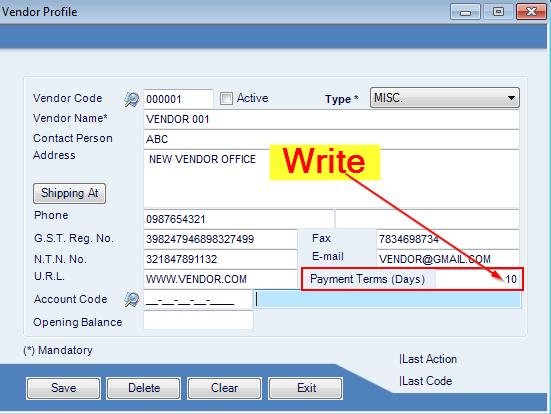
Step 5: You can set Payment terms for each vendor.
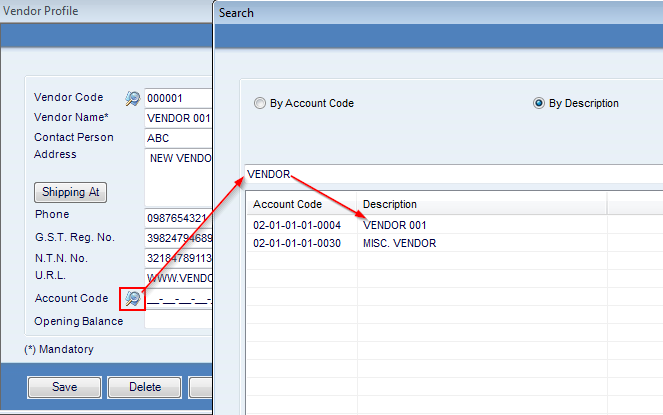
Step 6: If you are maintaining chart of accounts, You can assign a specific accounts code to each vendor to maintain your Liability account. Click on mirror icon before “Account Code” and search for your vendor account in COA.
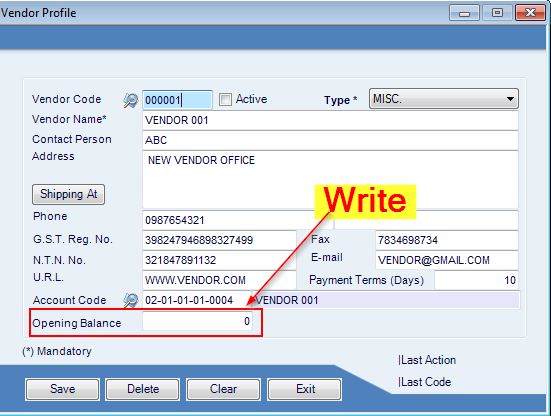
Step 7: Put an “Opening Balance” for the vendor (Opening balance is usually the outstanding balance). If it’s a new vendor, Put a Numeric “Zero”.
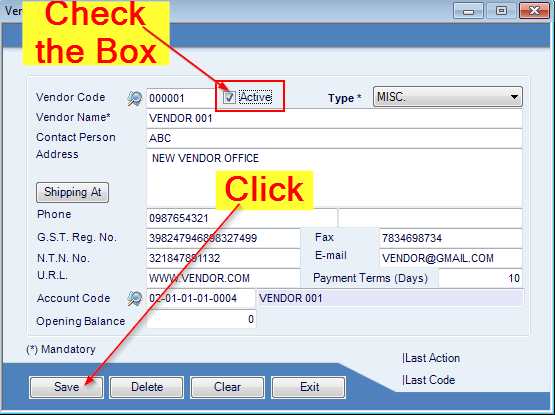
Step 8: Check “Active” box and click “Save”.

Leave a Reply