There are three steps in ESRP to complete a purchase. First we issue a purchase order to our vendor, on second step, vendor delivers products to us and on third step, and warehouse incharge receives products in stock.
Purchase order:
Step 1: Go to “Purchase” menu and click on “Purchase Order”

Step 2: PO No. is automatically generated by software. So move to “PO Date” where current system date is appearing by default. (You may overwrite PO date if you are going to make a pre or post dated Purchase Order)

Note: Dates are non-editable in each form, so be careful when typing date of any form.
Step 3: Move to Document No. You can write your own identical PO No. in document no.

Step 4: Select Vendor for PO by clicking on mirror icon before Vendor. It will redirect you to Vendors list.
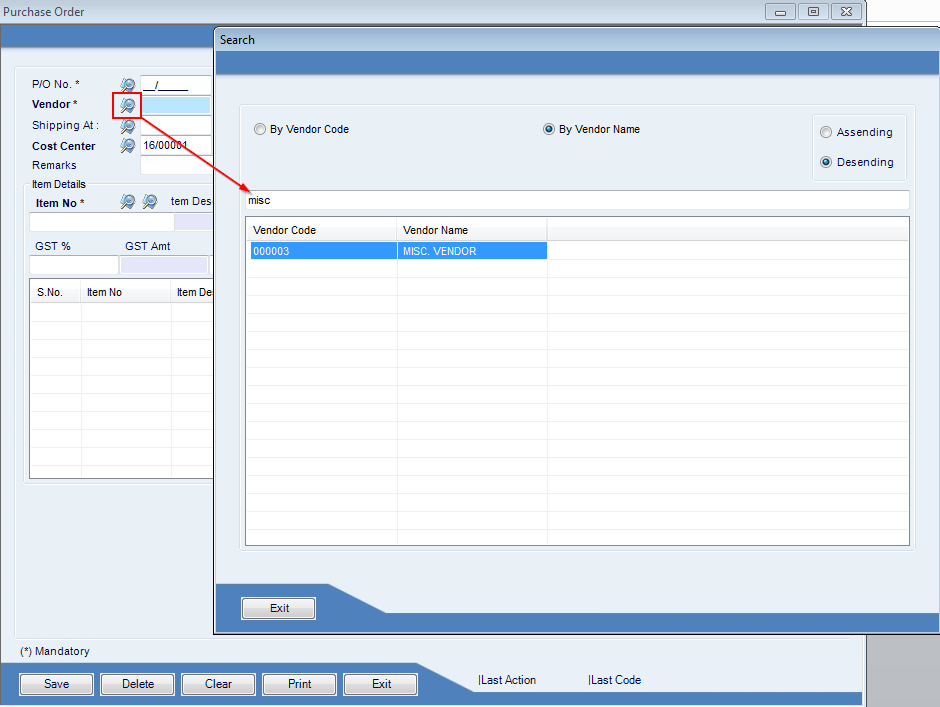
If vendor is not listed, click on “Vendor” and you will have access to Vendor setup form to add a new vendor. See “How to add New Vendor Profile in ESRP?” to know how to add a new vendor.

Note: “Cost Center” is designed to overview all transaction taking place under a specific project. It will be defined thoroughly in coming posts.
Step 5: Add remarks, if any.

Step 6: Select item that you want to add in purchase order. There are two mirror icons in from of Item No. First icon (F4) shows list of only those items that are available in stock.

Other icon (F3) shows complete list of items including the item with zero quantity.
If item is not listed, add a new item. See “How to add Item/Product in ESRP (General Tab)?”to know how to add a new item.
Step 7: Write down required quantity, weight and rate of item (Rate is estimated and is editable at the time of Goods Receipt)

Step 8: Mention GST percentage if applied. If not, leave it as zero.

If GST applied, un-check upper check box of “Exempt from tax”.
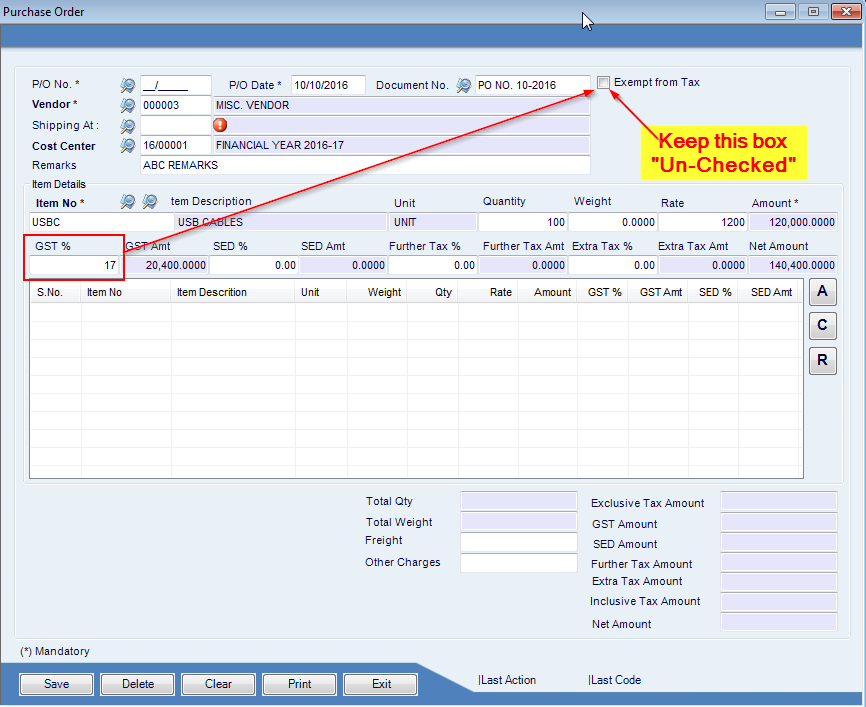
Step 9: Add SED, Other Tax and Extra Tax percentage if applied.

Step 10: Click “A” to add the product in “Grid” area. Click “C” to “Clear” the line and “R” to “Remove” the selected item from Grid.

Step 11: You can see total of Amount and GST. Put expected “Freight” or “Other Charges”.

Note: You can add multiple items in one PO by following the same steps.
Step 12: Click “Save” to save the PO requisition.

Step 13: PO Requisition is saved in your record. To take a Print of requisition, Click on mirror icon of “PO No.” In list, POs are saved in descending order by default. You will find multiple option, PO No. PO Date, Vendor etc to search a PO.

Step 14: Once you find the PO you want to print, Double click. Requisition is opened. Now click on “Print” to print the requisition, on “Delete” to delete, on “Clear” to Clear and on “Exit” to close the window.


Leave a Reply